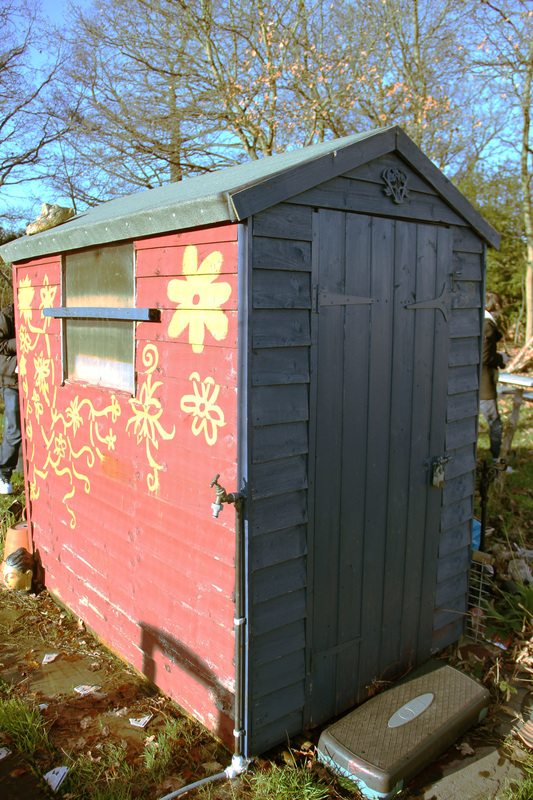
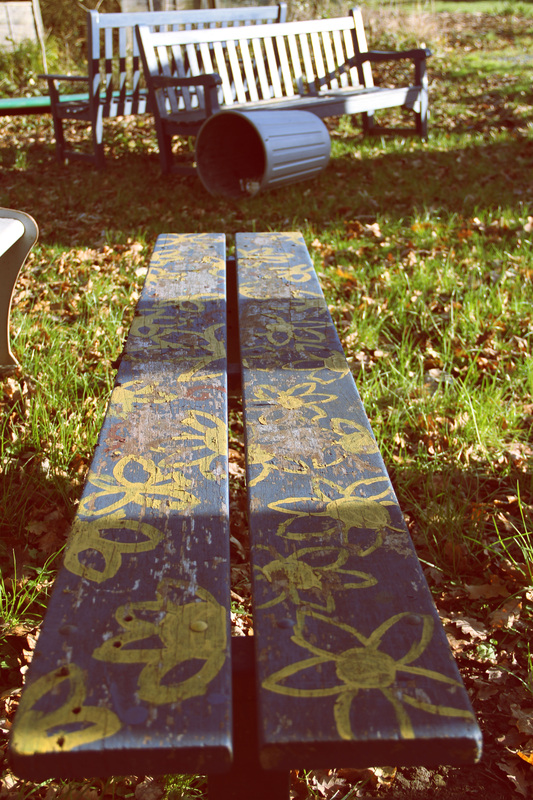
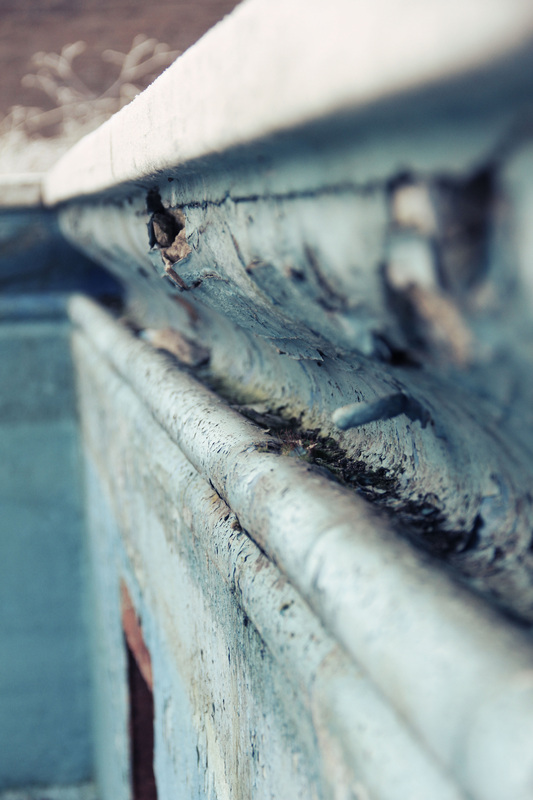
School Allotment


We went to the school allotment and took several photo's of the environment, The allotment seemed very run down and paint was falling off the shed and benches. This gives the photo a very run down feel and shows a different side of the school environment, it shows nature taking back the environment. I tried to take photo's of the run down and abandoned feel of the place. I captured the rusting bars and the peeling paint. I didn't really like the environment as it was a bit un-natural and looked a bit like a tip as their was random objects scattered around. I don't think I will carry on with this type of environment as it is a bit ugly.
Nadav kander-half life
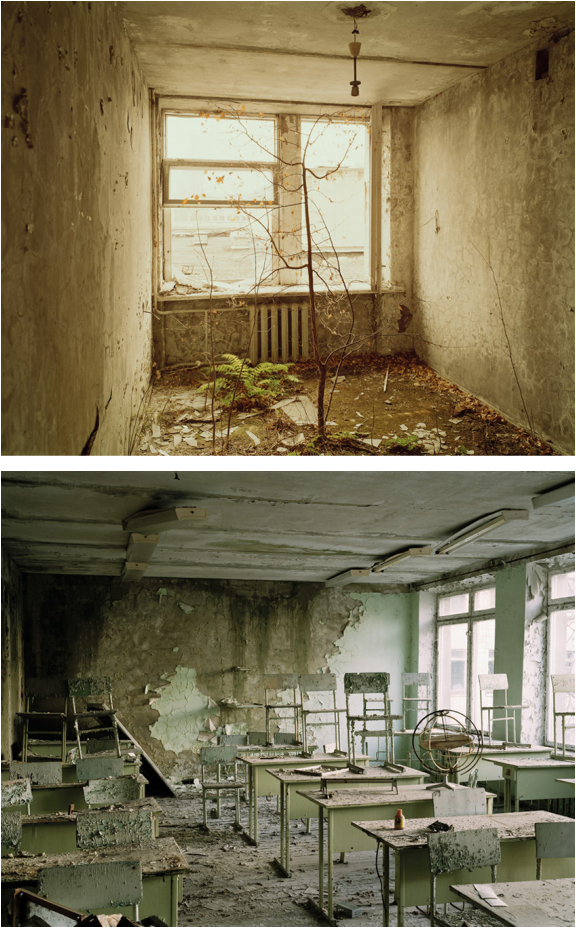
This image was taken by Nadav Kander in Chernobyl. This image consists of a small apartment room which has been taken over by nature and the man made material and building will be taken back by nature. In the image you can see two plants coming through the ground this shows that although humans had to leave nature has stayed and reclaimed the land. Chernobyl is an example of what would happen if all human life had vanished. The image has very little colour as the saturation has been taken away. This symbolises how (human) life has been taken away. He has also used the building as building are used to protect humans from the outside world but as this photo shows nature has come through and destroyed this barrier between nature and human life. Also in this image is a very de-saturated look which gives the image a feel of lifelessness.
This photo is also shows the rush of people leaving as life had vanished within seconds. the paint pealing off the seats and wall is very scary and gives a very spooky feeling. The desaturated colour shows how the life has been drained out of this place and how lifeless the area is. The image has been composed with lots of thought as it was an important place. The photo shows how run down a place can become even a place like a school which is used everyday. But once everyone has left and it has become lifeless the life begins to drain it was out of the object and the building back into the environment again and return to the natural cycle of things.
This photo is also shows the rush of people leaving as life had vanished within seconds. the paint pealing off the seats and wall is very scary and gives a very spooky feeling. The desaturated colour shows how the life has been drained out of this place and how lifeless the area is. The image has been composed with lots of thought as it was an important place. The photo shows how run down a place can become even a place like a school which is used everyday. But once everyone has left and it has become lifeless the life begins to drain it was out of the object and the building back into the environment again and return to the natural cycle of things.
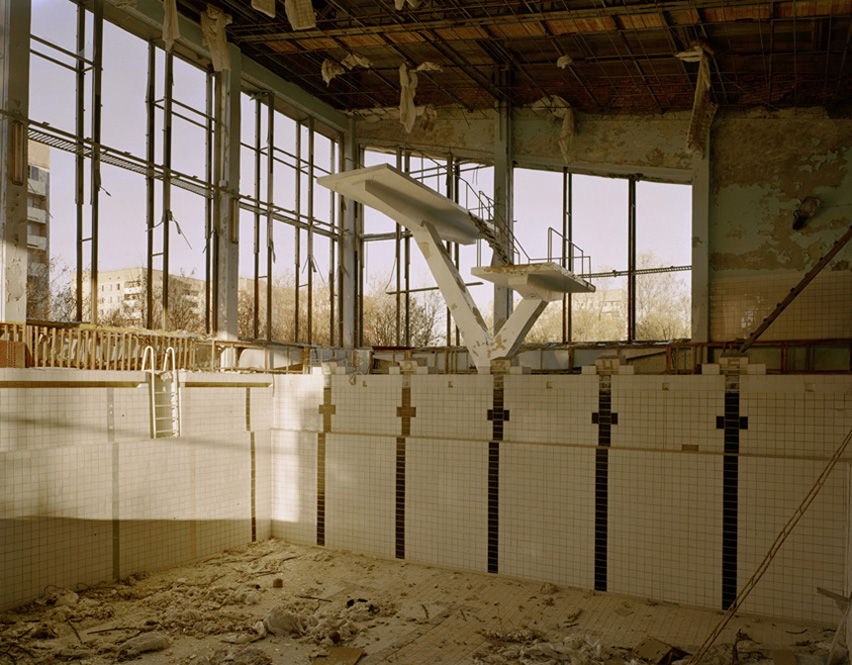
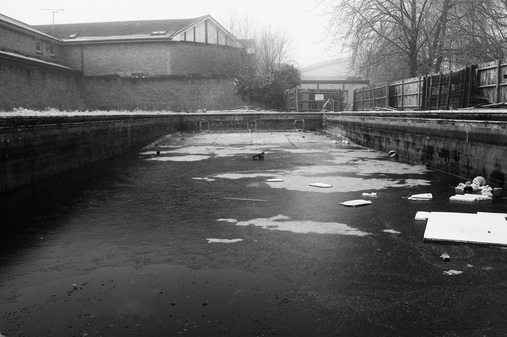
The Pool
|
We took inspiration from Nadav kanders photo of the abounded pool and our class went to our schools pool, while I was their I tried to capture the cold in the environment ,with the frost making everything look very nice. I think the black and white effect made the photo's seem colder and they have a greater effect on the audience than the coloured image. I think winter is a nice season to take landscape photo's in as they trees and the natures is in a completely different state to summer and other seasons as the colours are much more plain and lifeless as the leaves etc have fallen.
|

|
|
Colin Winterbottom
|
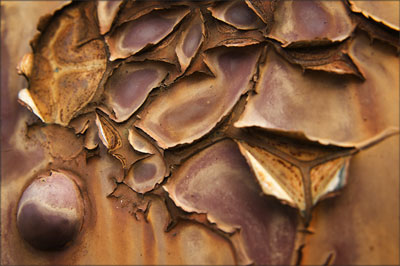
These photos are from the artist Colin Winterbottom, They are of detailed textures, the textures are full of colour and shadow. They are framed so that they fill the hole image and so the audience gets to see the hole of the object. They are close up shots of 3d textures that seem to come out of the photo. I like the photo's of the rust as it shows the paint peeling off the metal and creates a intricate pattern. I really like the different shades of colour and textures. The colour correction really brings out the tone of the photo. I would like to try and take some close up photo's of textures in my local area. I would like to take photos of organic textures, as I find them more interesting as the natural patterns are much more creative and powerful.
|
|
|
The Woods
|
|
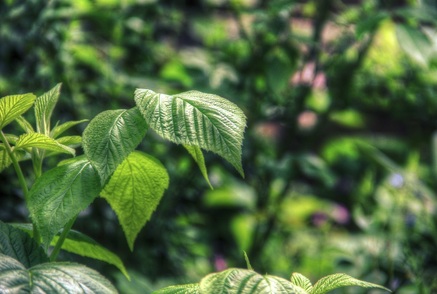
After seeing the work of Colin Winterbottom I wanted to take some close up textures of myself so I went to the local park to take a few photo's, I based my photography of close up and the detail in nature for example the lines of the trees and the pattern's. After we took the photo's I edited them using photoshop I changed the contrast to bring out the shadow and I also played with the saturation and colour curves. I think the photo's came out quite well as they look very nice and detailed. I like the fact that their is a low aperture so their is a lot of bokeh. I think nature is a nice medium for landscape and i think i will carry on with this environment in my landscape work. I may want to contrast the Nature and city environment. I edited these photos on Adobe Light room where I was able to adjust the shadows and clarity of the photo to bring out the textures of the local environment.
|
|
|

|

|
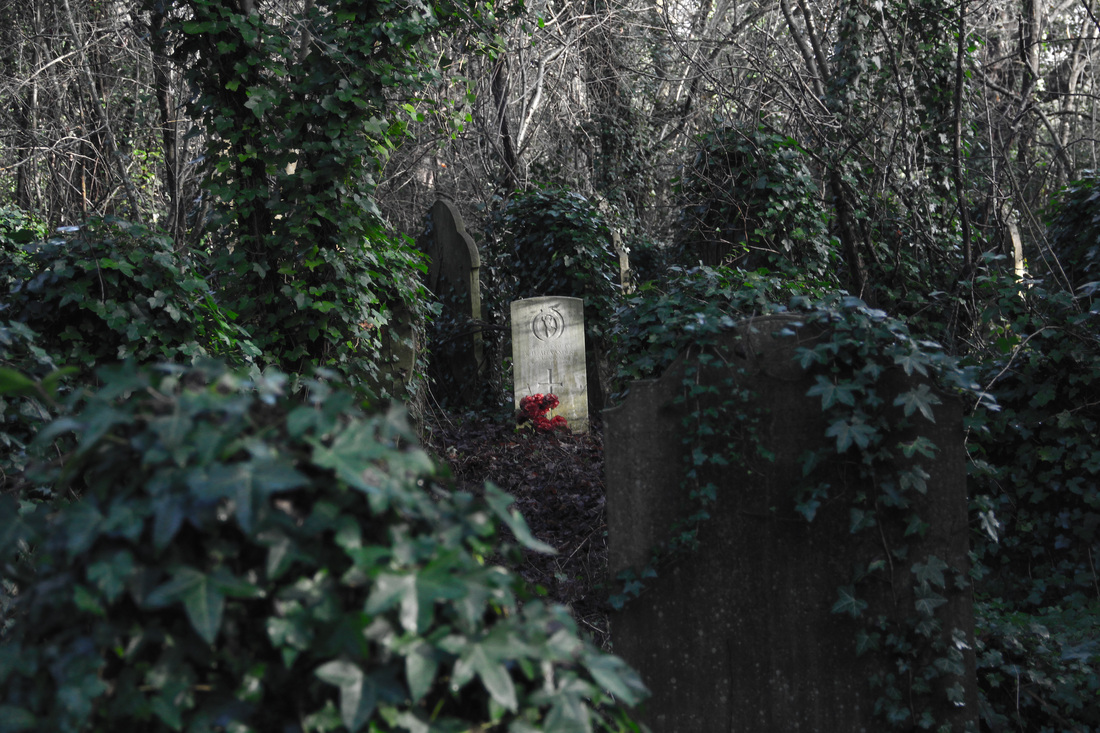
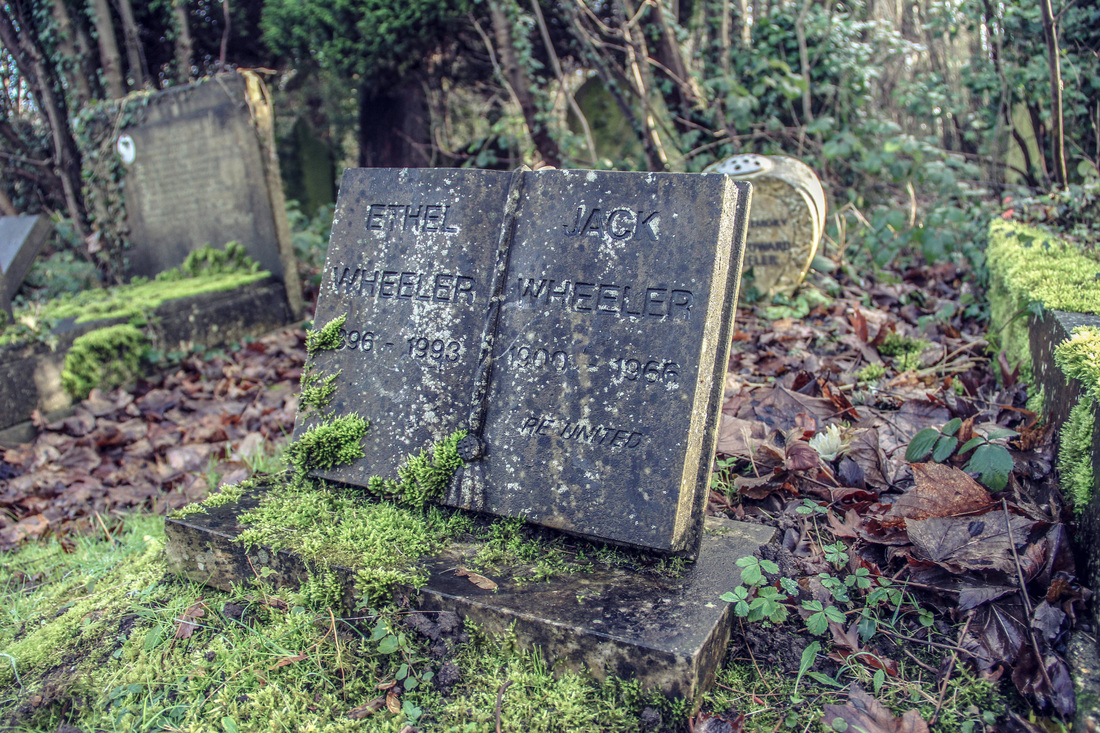
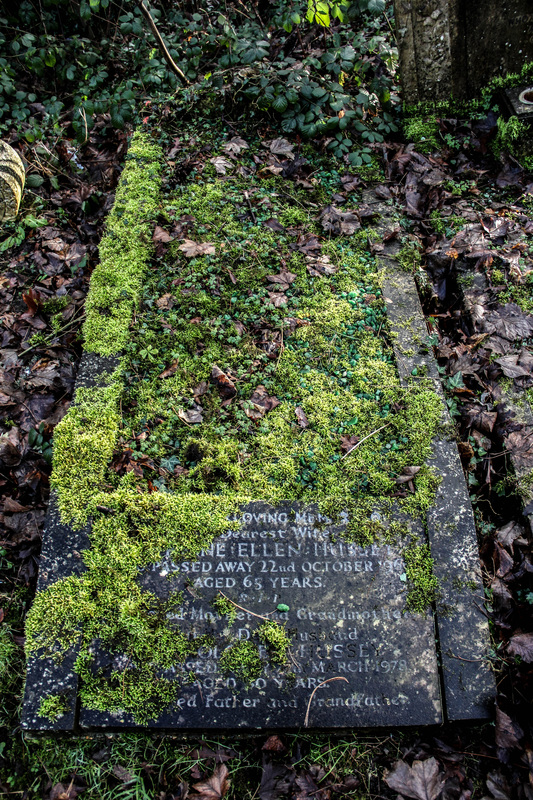
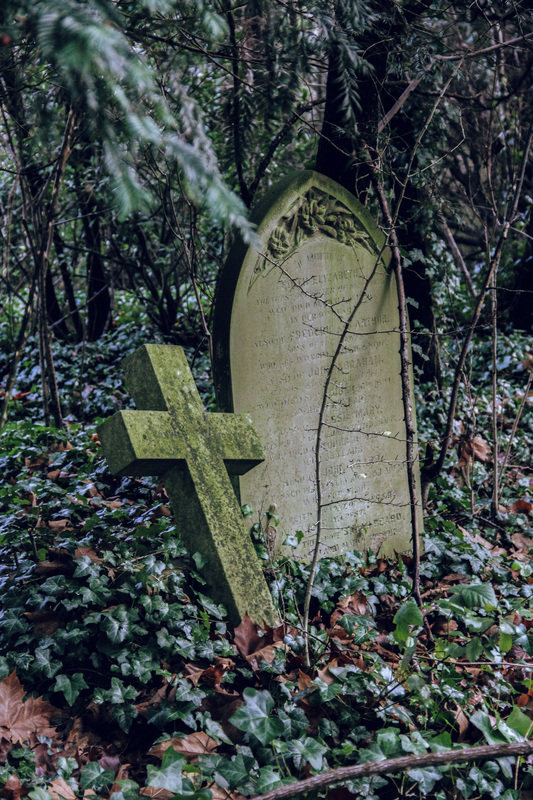
The Graveyard
|
We visited a local grave-yard to take a few photo's, the grave-yard was a bit overgrown and this made for very cool photo's as the image above shows. the contrast between the new untouched grave stone and the other older graves which have been covered by nature and are being returned to nature. I edited the photo by reducing the saturation which symbolises the loss of life and I also played with the colour curves. I think this photo is very effective and i would like to carry on with this type of environment.
|
|
|
Hampstead Heath
|
|
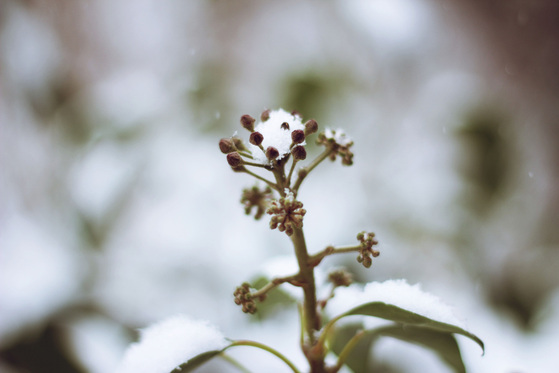
I went to Hampstead Heath to take some photo's, the woods were covered in snow and it looks really nice I decided to do some close up photo's of the wild life and the plants and tree's. I think the edited photo's below are quite good as they show a different side of the london environment and shows that there are a few large green area's in london. Some of the main focus of the photo's was the plants and tree's of the woods. I think they look very good as they have a lot of detail and show how snow fall's and creates a cover for nature. I could have taken more photo's with a focus in mind, maybe just focusing on small pants and the low ground environment. I edited the photo's by adjusting the brightness and contrast, I increased the contrast to make the darks stronger and more powerful then I adjusted the brightness to balance out the contrast changes. Then I edited the photo's by adjusting the curves and make the photo a little bit redder and blue. I think the editing has come out quite well and the photo's look very nice and finished.
|
Formal Elements
PERSPECTIVE
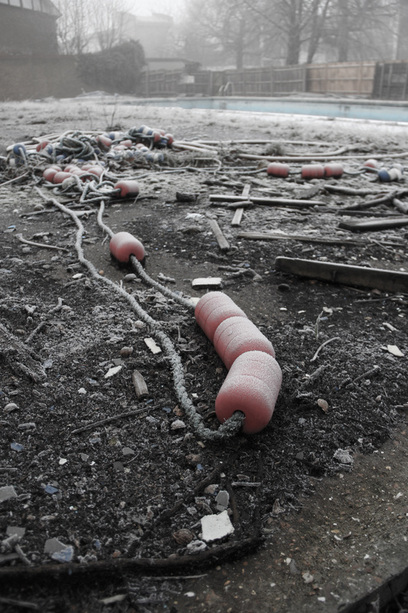
This photo was taken at the school pool when it was cold and frosty. The main focus on the photo is the Pool equipment laid out in front of the photo. The photo has been taken with a high angle facing down to create the perspective. I have edited the photo but reducing the saturation and adjusting the colour curves, I did this only Photoshop and i think the editing is quite good as it symbolises how the pool has been left and it is now lifeless. I could improve this photo by adding a nice background for example the rope could be in the actual pool, this would make the photo more interesting and make it more powerful.
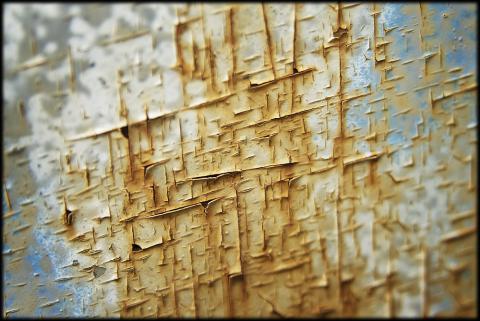
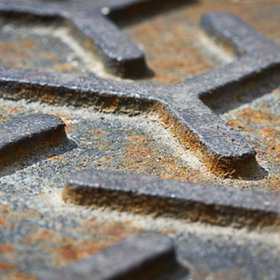
PATTERN
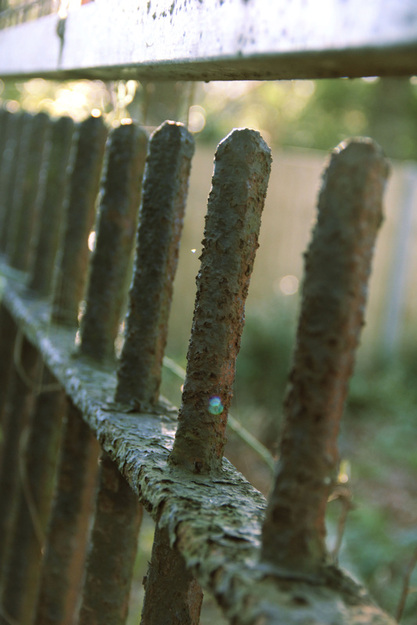
This photo was take at the school allotment, I has a focus point on one of the spikes on the fence. I tried to capture the rusting on the fence and the texture of it. I edited this photo using photoshop i used colour curves to make the photo look rusty and match the actual photo. I think it came out quite well as the photo gives a rusty feel and the low aperture of the photo with only one spike in focus makes it more powerful and really shows the detail of the photo. It could be improved by taking the photo less at an angle so the photo is flat. I could have also used HDR to give the photo more detail and create a better more natural looking photo.
LAYERS
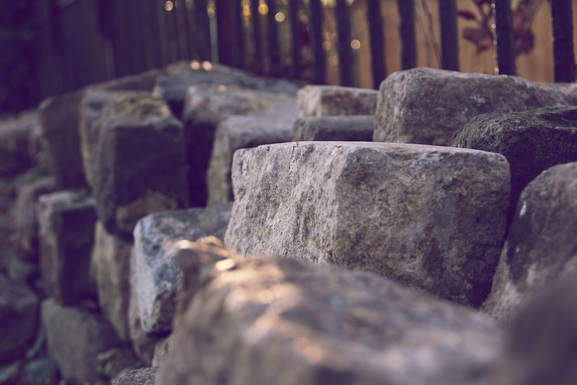
This photo was also taken at the school allotment, I was thinking of a photo for layers and I came across these bricks and bricks are always layered to make houses and walls. so I decided to take a photo and try and capture the different layers, i did this by having a small aperture so the other bricks will be out of focus and the wall will seem more layered as their is a layer in focus. I edited the photo on photoshop by adjusting the sharpness and the curves, I think the editing of this photo could be improved to make the photo look more natural and I think the curves are a bit over used and a bit much.
FOCUS / DOF
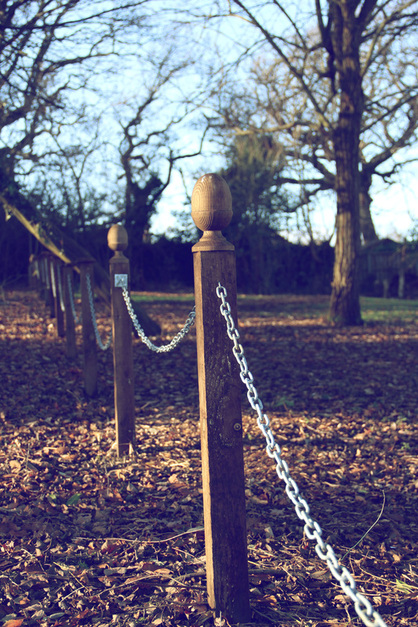
This photo was to symbolise focus/ Dept of Field, I thought this fence would be quite good as it is a repeating pattern and you can see which are in focus and out of focus. So i used a small aperture so there will be lots of bokeh and the other posts will be out of focus. I edited on photoshop to adjust the sharpness and the curves, I tried to make the photo brighter and give it more colour, but I think if i edited it again I would change the use of curves.
CONTRAST

This is a photo I took for contrast, I took it because I think the tree has good contrast with the sky. I edited the photo with photoshop I adjusted the contras and saturation, I think this photo could be improved because the lighting is not very good as it doesn't look very nice, If i was to retake this photo I think I would use a longer shutter speed and edit the photo differently.
NEGATIVE SPACE
This photo was taken with negative space in mind which is why I choose a small aperture to create lots of bokeh and have the background in blur. so only the focus of the photo is viewable. This makes the plant stand out and gives it more power and makes it more meaningful. The use of negative space brings out the focus of the photo. I think this photo is very artistic and looks nice, it could be improved by maybe taking it from a higher angle so only the flower of the plant is in focus and the stem of the plant is out of focus.
TEXTURE
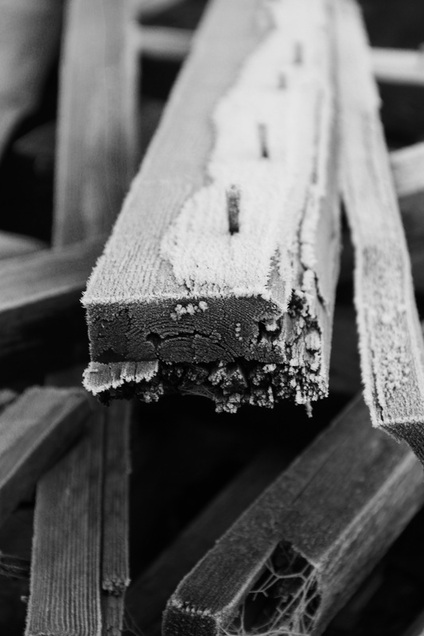
This is my photo for texture, I wanted to capture the cold and frost on the day i took this photo, i decided to take a close up shot of a broken fence and i think it came of fantastically. I really like the outcome. I edited the photo by making it black and white and also changing the contrast and clarity to give the photo more detail and make it look nice and give it more texture. I think if I was to retake this photo i would use a larger aperture to get more of the 4 by 4 in focus so you can see more of the frost.
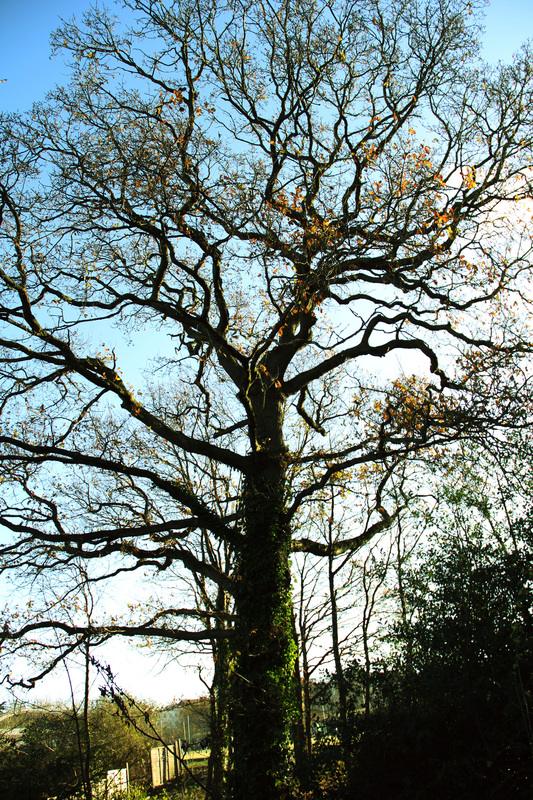
SCALE
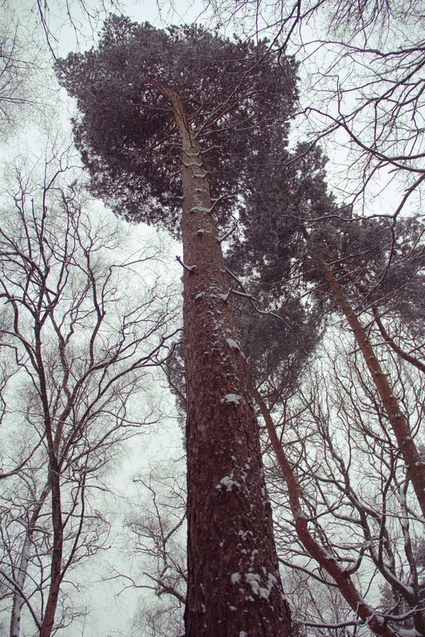
I took this photo trying to represent scale and i think it has come out quite well as it makes the audience feel small and this is because the tree stands so tall above the audience. I think this photo could be improved by taking it from a lower angle with a large aperture so all the tree is in focus. this will make the photo more powerful and give it a larger scale. I think this photo is quite good though as it does give a scene of scale and it does make you feel very small and meaningless.
MOVEMENT
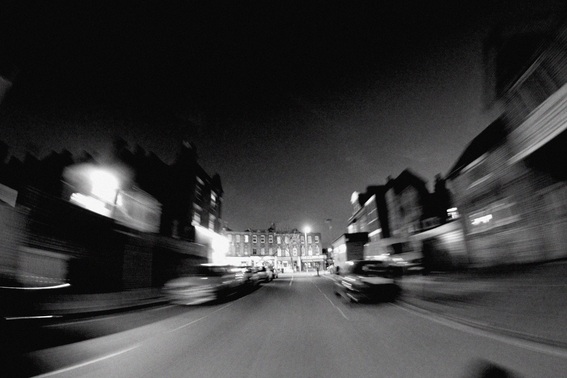
These are some photos that have a longer shutter speed so it shows motion of light hitting the sensor of the camera, these photo's where taken on the back of a motor bike and with a shutter speed of 1/30th of a second so it can capture the movement of the bike, i think they came out quite well as some of the photo is not blurry but the edges of the photo show a lot of blur so you can see the direction of travel.
COLOUR

This is the photo I took for colour, I tried to capture the colour of the plastic and rope. The main focus is the frost on the plastic. I used photoshop to edit the colour curves and i think it came out quite well as the colour of this photo is very nice and has a large range. I also changed the contrast and clarity to give the photo more light and give it a more natural look. I think the frost look very good in this photo as you can see how it forms on the subject and I think this is pretty cool. If i was to improve this photo I may try and use black and white to see how it looks because black and white gives it more contrast and sometimes makes the photo look a lot better.
TONE

I took this photo with tone in mind i think it came out quite well as it has a lot of shadow on the left hand side and the photo looks very nice and powerful. I used photoshop to change the photo to black and white. I think i could of framed the photo better and maybe have a higher angle facing down towards the pool. I think the editing it pretty good as it gives a lot of tone and I think it is a good example for tone.
BALANCE
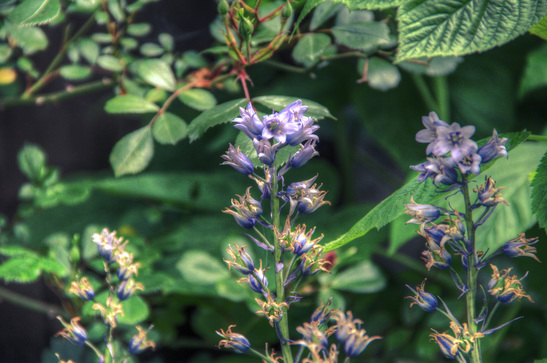
This is a photo that shows the use of balance in a photo, it shows a plant that takes up most of the photo but there are more flowers in the photo so there is very little negative space and the photo is very busy. I think this is a very powerful photo as it shows the flower in extreme detail, it is very good as the colour is very vibrant and natural.
Eugene Richards's
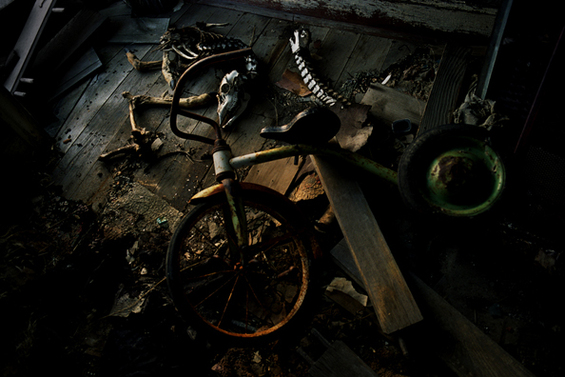
Eugene Richards is a photographer who goes and takes pictures of abandoned houses, the photo to the right is a bike which has started to rust and fall apart, items like this are very interesting because they are very important to children and it is strange how it was just left. This makes the audience ask questions like "why was it left?" & "what happened to the family?". I think this is a very good way to capture the audiences attention and keep it. With out giving a description of the image it gives it power and leaves a cliff hanger to the picture. This image doesn't have much light and therefore the image is fairly dark. You can see a few bones and a bicycle this is a very strange scene as it holds a lot of questions and no answers.
|
|
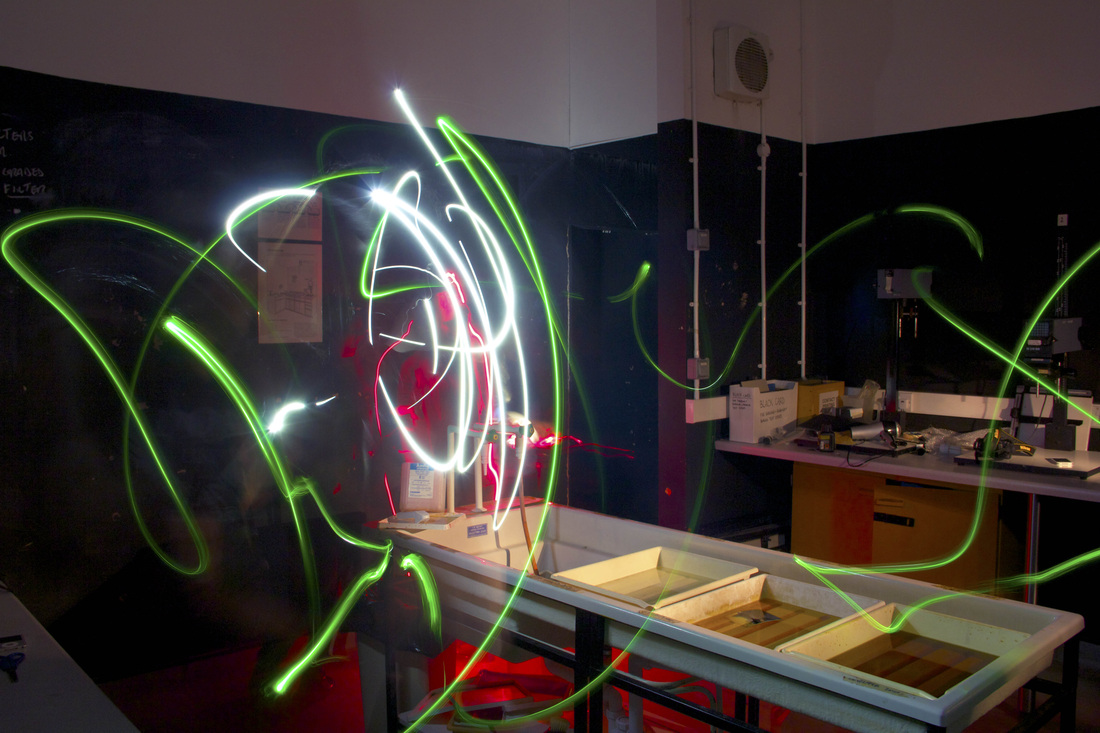
Michael Bosanko
|
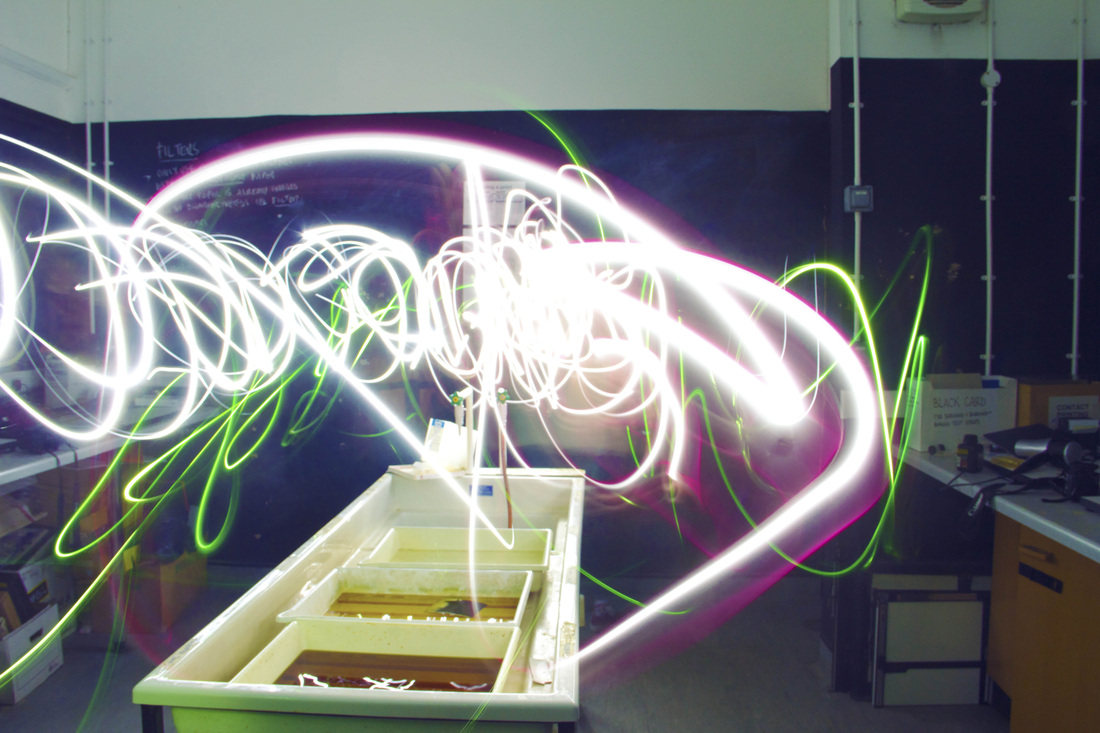
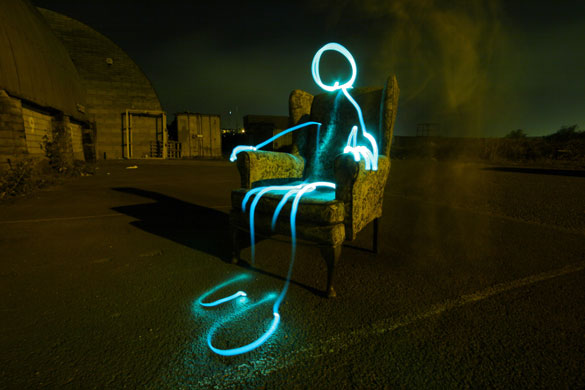
Michael Bosanko plays with light and these photo's are an example of the work he does. He uses a long shutter speed to capture the light movement. I think his work is very impressive as he creates a impressive image with the light he has moved around. I will mess around with a long shutter speed and playing with the movement of light. I like how he uses real objects with the light he has made. I think this makes a very interesting and colourful image and it is very impressive. I also like how he makes real objects out of the light not just patterns and effects. He creates buildings and people.
|
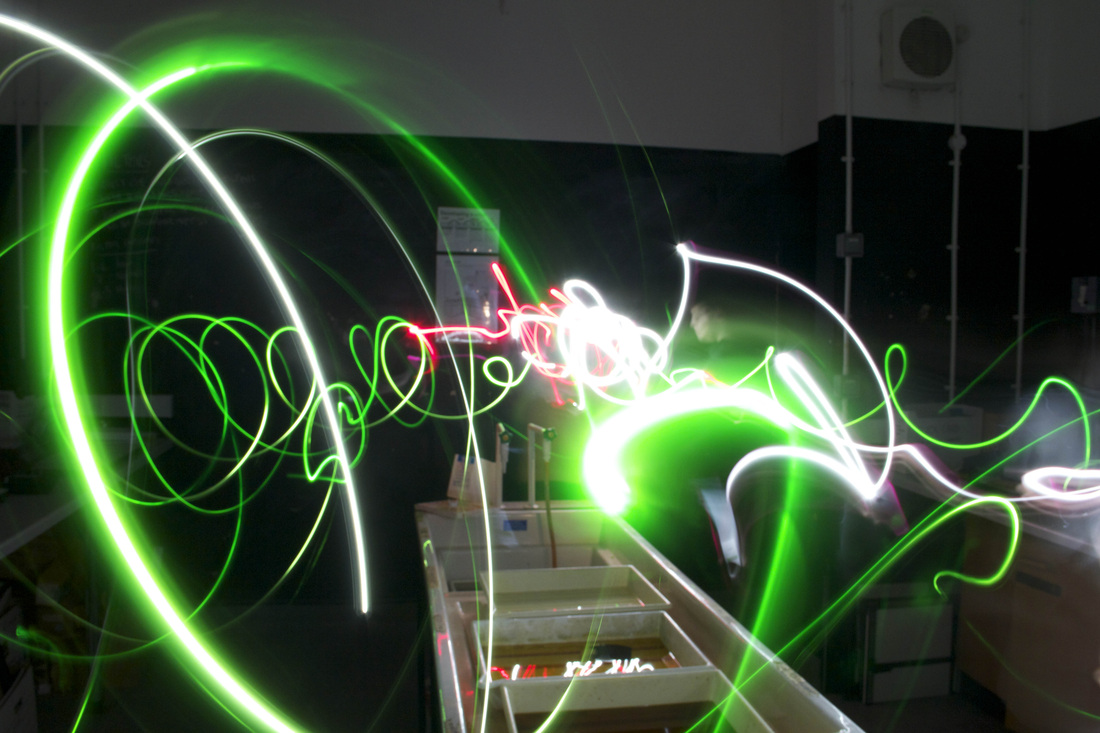
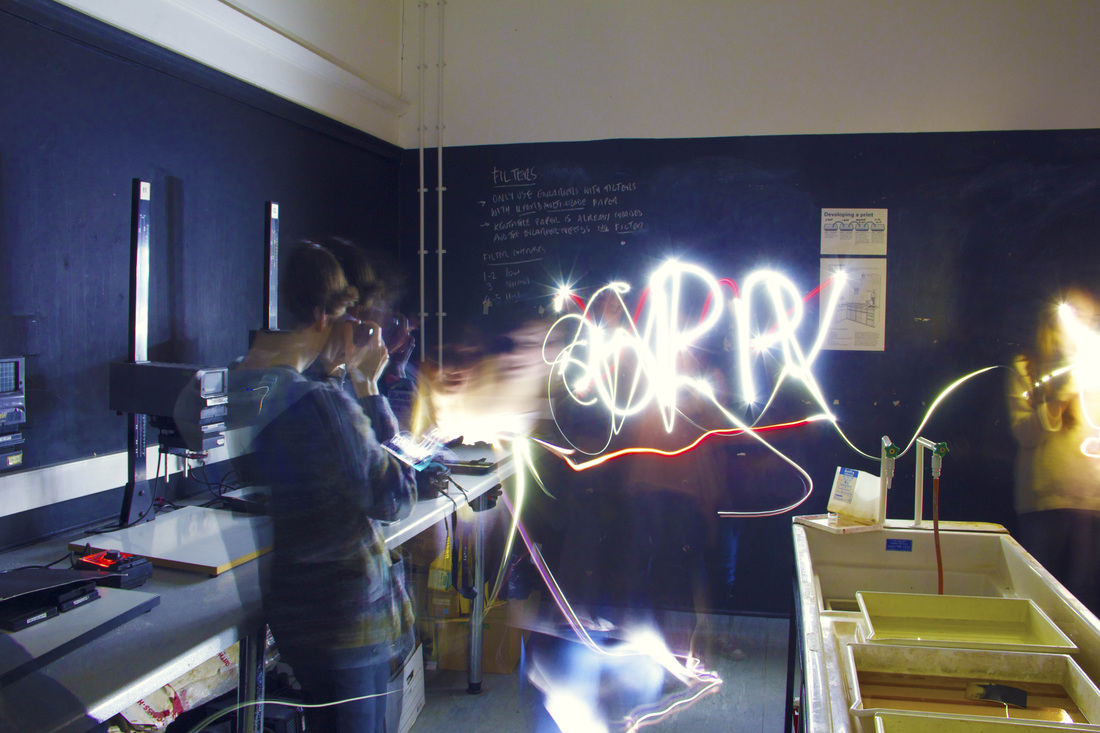
Light Painting
|
This is my response to Michael Bonsanko, We played around with light painting, these are some of my results. I took a shutter speed of 30 seconds which made a cool effect because you captured the light moving. I think some of these photo's are pretty cool and I think I should try and use this method in the local environment capturing the car lights etc. These photo's could be improved by using a different back drop and have a actual idea for the moving light instead of just moving it around randomly. This makes me want to carry on and use other techniques to capture Light and movement. I think I should try and make a time-lapse which captures the movement of people and light and the sky. I think it will be quite a good technique to use.
|
|
|
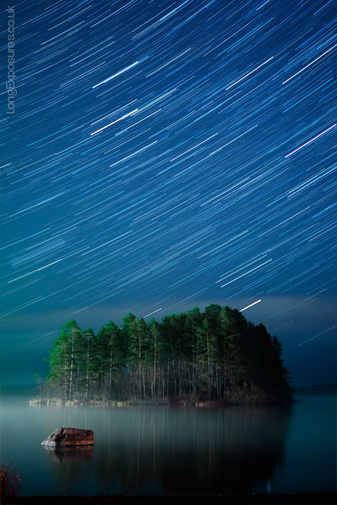
Andrew Whyte
|
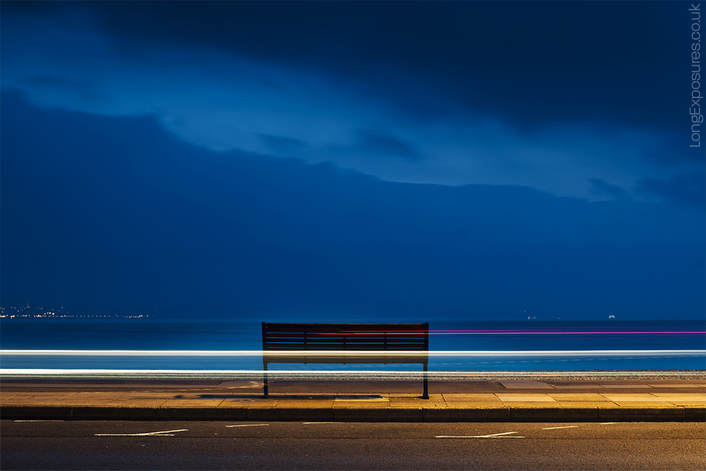
These are some long exposure shots by Andrew Whyte, I think these are very good photo's as they capture the movement of the stars and cars. I like how they show the route the light has taken. The photo to the left is of a lake and a small island with the stars moving across the sky. I like how the base is very dim and it has nice lighting as the lake surface is very smooth and colourful. I also like the colour of the trees as they are very saturated. I would like to try and take some photo's like this, I would like to capture the movement of the objects and light. I like the photo below as it is really plane as there is only the bench in the shot. The colour is bright and full of
|
|
Time-Lapse examples
This is a time lapse video where the photographer take a photo every couple of seconds and then link them together and create a small video. capturing the motion of cars etc. After messing around with long shutter speeds I decided I wanted to try and create a time lapse. I came across this video and I really like the colour and movement of the long shutter speed shots all linked together. After seeing this time lapse video I searched around for more inspiration. I like the video above as it shows the movement of the city at night and it shows that the city never sleeps. I really like the colour correction as it makes the vibrant colours stand out and I also like how they capture the movement of people as it looks really different from normal life and normal speed as everyone is moving really fast but the camera is acting like it is seeing the world in normal speed as when the camera moves it is really smooth and realistic. I would like to try and make one of these videos as I like how it shows the world in a different view. I would like to make one of london and the movement of my city.
Landscapes: Volume 3 from Dustin Farrell on Vimeo.
This is a time-lapse video from Dustin Farrell. I think this is a fantastic video and it has been done really well, it was smooth and consisted of lots of shot which show the movement of life and space in the night and day. This is more based on the country side and outside the city. I think this is very good inspiration and I may decided to make a time-lapse. I think it is good to take a different spin of photography and get to see the world in more than one shot and in this case many many shot's. I think this one is a lot more about the environment as it mostly shows the movement of water the sky and stars, I like how it captures shadows and the movement across sky where it is a lot clearer than in the city with all the pollution in the air.
My response to time-lapse
This is my response to time-laps, I used a intervalometer to take pictures every 3 minutes with a shutter speed of 30 seconds and a F-stop 22. I then used googles software "google picasa" to put the photo's together to make the video. To improve this is will need to make the video longer and take more photo's. I will also want to take the photo's on clear night sky so you can see the stars moving across the sky. I used the video's above as inspiration to create my own time-laps. I think it came out quite well, I may decided to do a few time lap's of day time and night and put them all into one video. This video is very quite and focuses on the natural side of life and I will want to go out and take some time-lapse of busy london and the constant movement of a city. So to follow on with the idea I'm going to go to central london and make a time-laps of people walking past and capture the fast moving london environment.
Ollie Larkin
Ollie Larkin is a time-lapse photographer and the video below is an example of his work. I has been done very well and it's extremely smooth. He also has the camera moving through the video, I would like to take this and add it to my work. I would also like to take some shot's in the city to capture the movement of the city at night. So for my artist response to Ollie Larkin I think I will go to central london when it is dark and do some time-lapses . I may decided to take some in the day as well and combine them in to one small movie. I like Ollie Larkin's work as it is very professional and smooth, his work is also nicely put together.
Lapses in Light from Interval Films on Vimeo.
Time-Lapse test 2
This is a Time-Lapse I did in Camden, I don't think it came out very well so I think I should take photo's more frequently so I can increase the FPS. I may also want to take pictures in a more interesting place. I also think that night time photography is much better as you can capture the movement of cars and light with a long shutter speed. I do think this type of day time time-Lapse could work but you would need to use a busy place and take the time-lapse for a longer amount of time. So to improve this time-lapse I would need to keep it going for longer and maybe move the camera slowly, so when you make it into a film you can get a smooth looking effect with the time-lapse.
HDR Time-Lapse
How to HDR Timelapse from Dustin Farrell on Vimeo.
HDR Photo Examples
|

|
These are some examples of HDR photography, I took 3 photo's with a under exposed and a normally exposed shot and a over exposed shot. Then I went on Photoshop and combined the 3 photo's to make a HDR photo. I then edited the photo's to adjust the brightness and contrast. I also edited the colour curves.
HDR video
|
This is an example of a HDR video that I did, It combines 3 bracketed photo's that have different exposures and then when I got home I combined them to create one HDR photo and I then used google picsia to link all of the HDR images together. I think it looks very good as it shows the image in its true light and I love how all the shadow and textures have more clarity. I also like how the images focus on the subject so you can see the focus going in and out. The colours also look more defined and colourful. I think it could be improved by having the photo's taken on a nicer day and also having the camera move around.
|
|
What I aim to do
I am going to try and make a time-lapse that consists of many different shots of day and night shot's. I'm also going to try and use different environments such as the city and the country-side. I aim to make it around 3 minutes long, I'm also going to add some music to my video. To achieve this I think I should use a higher FPS so the shot is a lot smoother and looks more professional. I'm also going to try some HDR (High dynamic range) time-lapse. To do this I will need to take 3 shot's with different exposures and then edit them together after the shot has been complete. The video above shows how to achieve this effect.
Time-Lapse video
This is a Time-Lapse I did which is of the night sky which then moves into day and the last clip is a HDR time-Lapse. This was done by having my camera on a ti-pod and using a Intervomitor. Then it was setup to take many photo's over a period of time. After I used two programs, I used Google Picsia for putting the images into a time-lapse then for the HDR shot I used Photomatrix pro to the 3 shot for each frame into a HDR file which was then put into Google Picsia. I then edited all the movie files in Adobe After effects to add the music and put the clips together. I think it looks quite good as the time-lapse goes from night to day. To improve this I think I should take some time-lapse in central london in the day time to capture the movement of people. I would take several time-laspe's and put them together.
Central London Time-Lapse
Extra Time Lapses |
This is a time-laspe I took in central london, it combines many different aspects of time-lapse's I took one facing a rounded mirror and then took photo's walking across a bridge. And then I took a shot looking over the bridge from high up. I think it came out quite well as it all links together. I also like the time-lapse of me walking along, I would like to expand this idea. It could be improved by taking more photo's so it is smoother and pleasing to the eye and heart of london. For my final Piece I would like to take a few time-lapse's of central london but link them together by taking a time-laspe of me walking from place to place. I think this will look quite good but I will need to stabilise the shot. This Time-Lapse could be improved by making the video a lot smoother by taking more photo's and increasing the FPS.
|
|
These are a bunch of time lapses I have done over central london. Some of them are taken in the day and some at night capturing the night sky. I like the ones taken in the day as they capture the movement and life of the city. While the videos of the night capture the movement of the natural world and space. I like the video of the moon as it gives the moon detail so it is clear and easy to see moving across the sky. I also like the other night sky one as it capture the movement of the clouds and the moons reflective light coming through the clouds. I think this looks really beautiful because of the light coming through the clouds as it has lots of different colours and shades. I also like the videos of the people moving around in the city as you capture of a lot of movement in a small space of time,
|
|
Sam Robinson
New Promo Delivery from Sam Robinson on Vimeo.
This is a video from Sam Robinson, after seeing this I thought of strapping a camera to my chest and taking time-lapse of the moment of the car or bike. Sam's video has beautiful colour and I really like the framing of the moving video as there are lots of sections on videos in one frame. The video was taken on GoPro's which are small cameras that you can strap to your bike or helmet. I will be using my DLSR to take the timelapse. I will be wanting to take a route through central London on a motorbike, I will be taking a time-lapse on the front of the bike looking forward and I will use another camera to film landmarks as we go past them. When I get home I will be able to cut sections of videos and link them together ti create my final piece. I will hopefully make the video so it loops so when the audience sees it they will be able to start watching at any point.
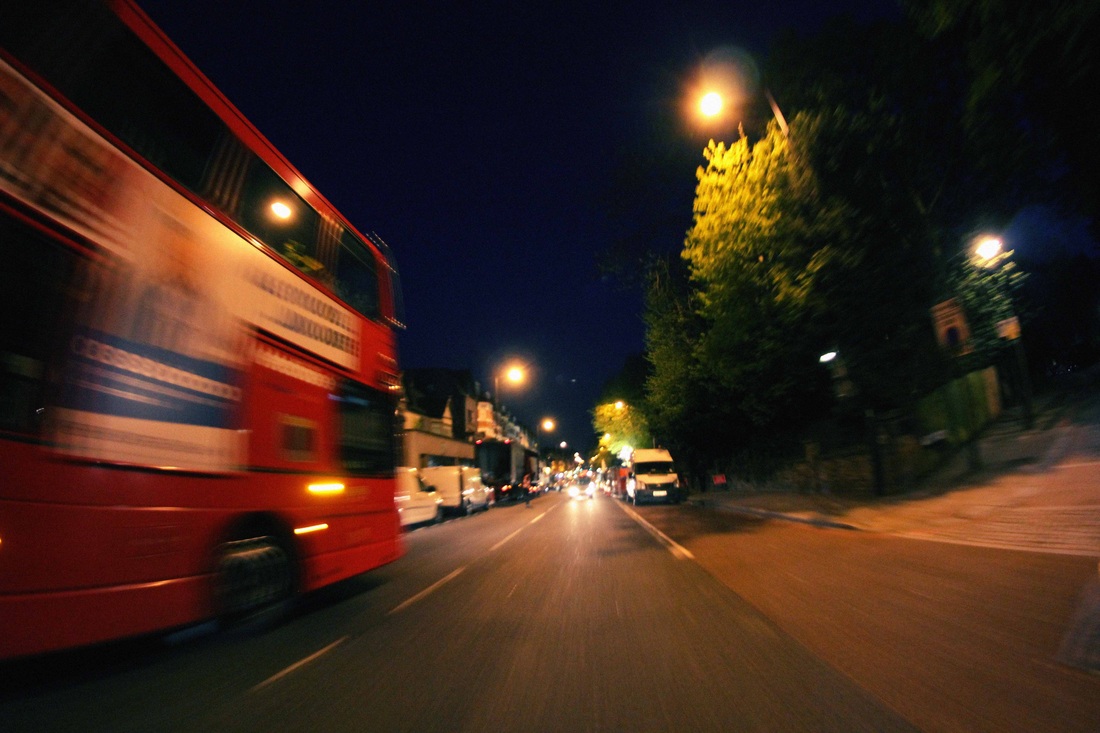
How I filmed the final piece
This is the setup that I used to capture my final piece, I used the camera strap and wrapped it around my neck and then using elastic cables around my waist to secure it to my back. I then plugged in the intervalometer to make the camera take photos every second. Once the sequence had been captured I used Google picsia to make the timelapse sequence.
Final Piece video
This is the draft for my final piece for Unit 1 Landscape, this is the base video and I will then add sections of time lapses of the video, These will be of the landmarks I go past like Big Ben and London Bridge. I think this looks good as you get to see peoples faces from behind the vehicle so you get to see there expressions when they are natural as they don't know you are taking photo's. I also like it as you get to see you travel and it is really cool because all the photo's link together and it creates motion. I also think that the all the bright colors that flow through the video show the busyness of the London Streets. This is also shown by the traffic that the driver swears in and out to avoid. The video could be improved by having more motion and maybe having several cameras so when I edit the video I could move between shots.
